Raspberry Pi - Spot Payload + Mount
- 1 minAfter creating the Pi4 as a payload, we had good luck running things off the Pi. We scp our files over to Pi, then ssh in run our scripts. This was going great, but the power bank was a pain to lug around, and was also causing occasional brown outs. When ever the CPU load spiked, the Pi ended up rebooting, stalling the mission
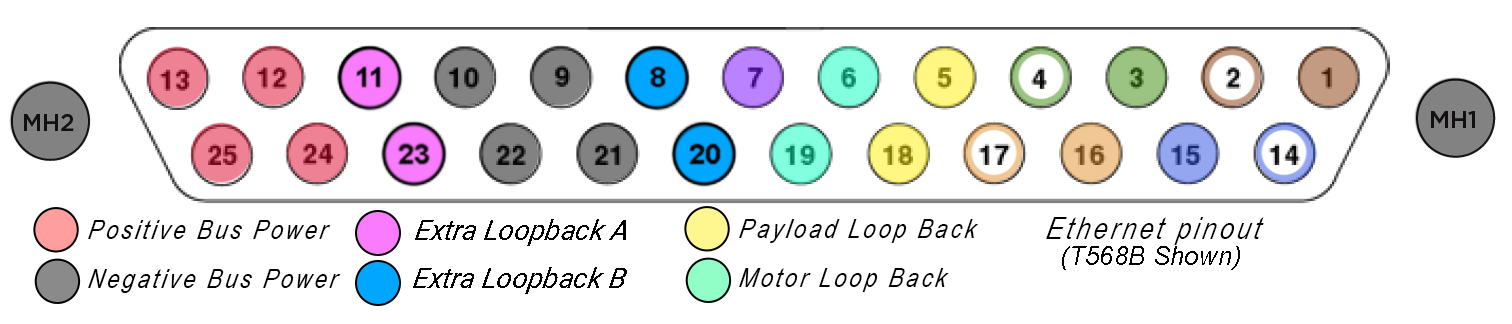
I decided to build a custom payload for spot. Time to tap the payload port on the back of spot, and see if we can mooch off the power from it
Considerations
- The interface voltage never exceeds 72V, and can accept up to 9-13A total current combined across both ports.
- The interface also allows you to tap into the network, which means I can get rid of the dangling ethernet cable.
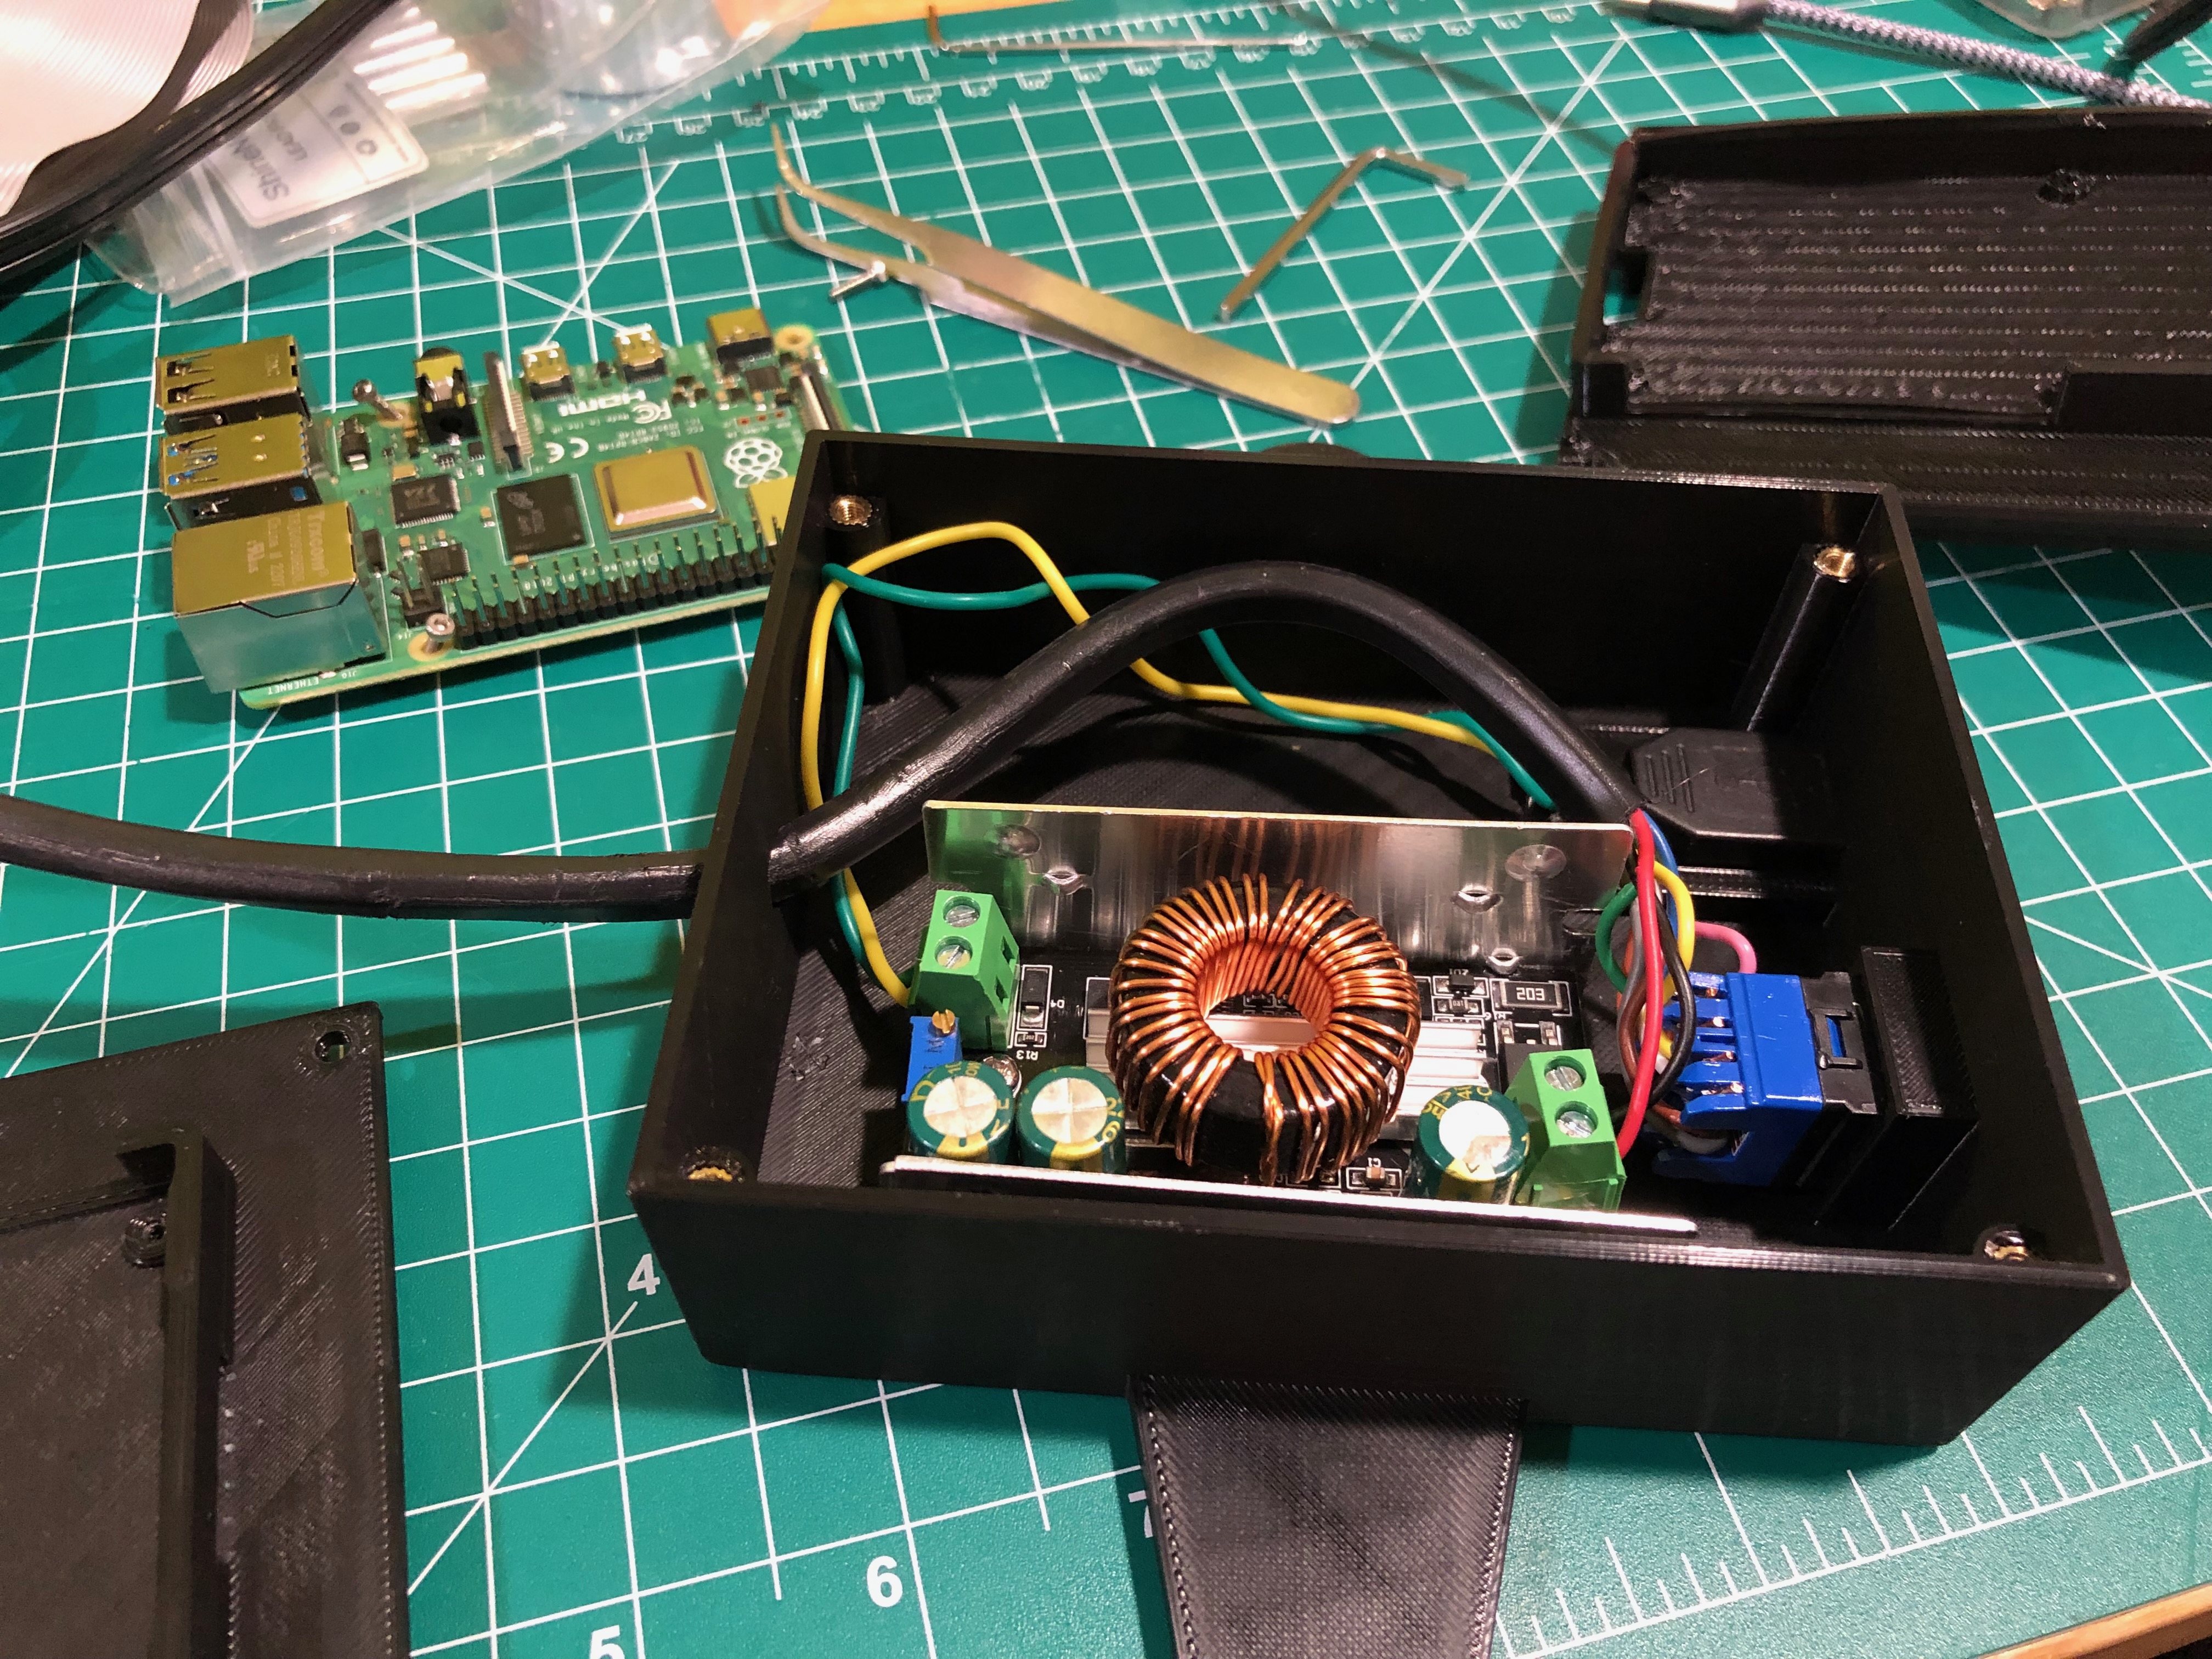
I had a couple of LM2596 DC-to-DC buck converters lying around, but the are limited to 35V/3A, but that was not going to suffice, I needed something more heavy duty.
Spot’s Battery voltage ranges from 35V for a fully discharged battery to 58.8V for a full charge.
Components
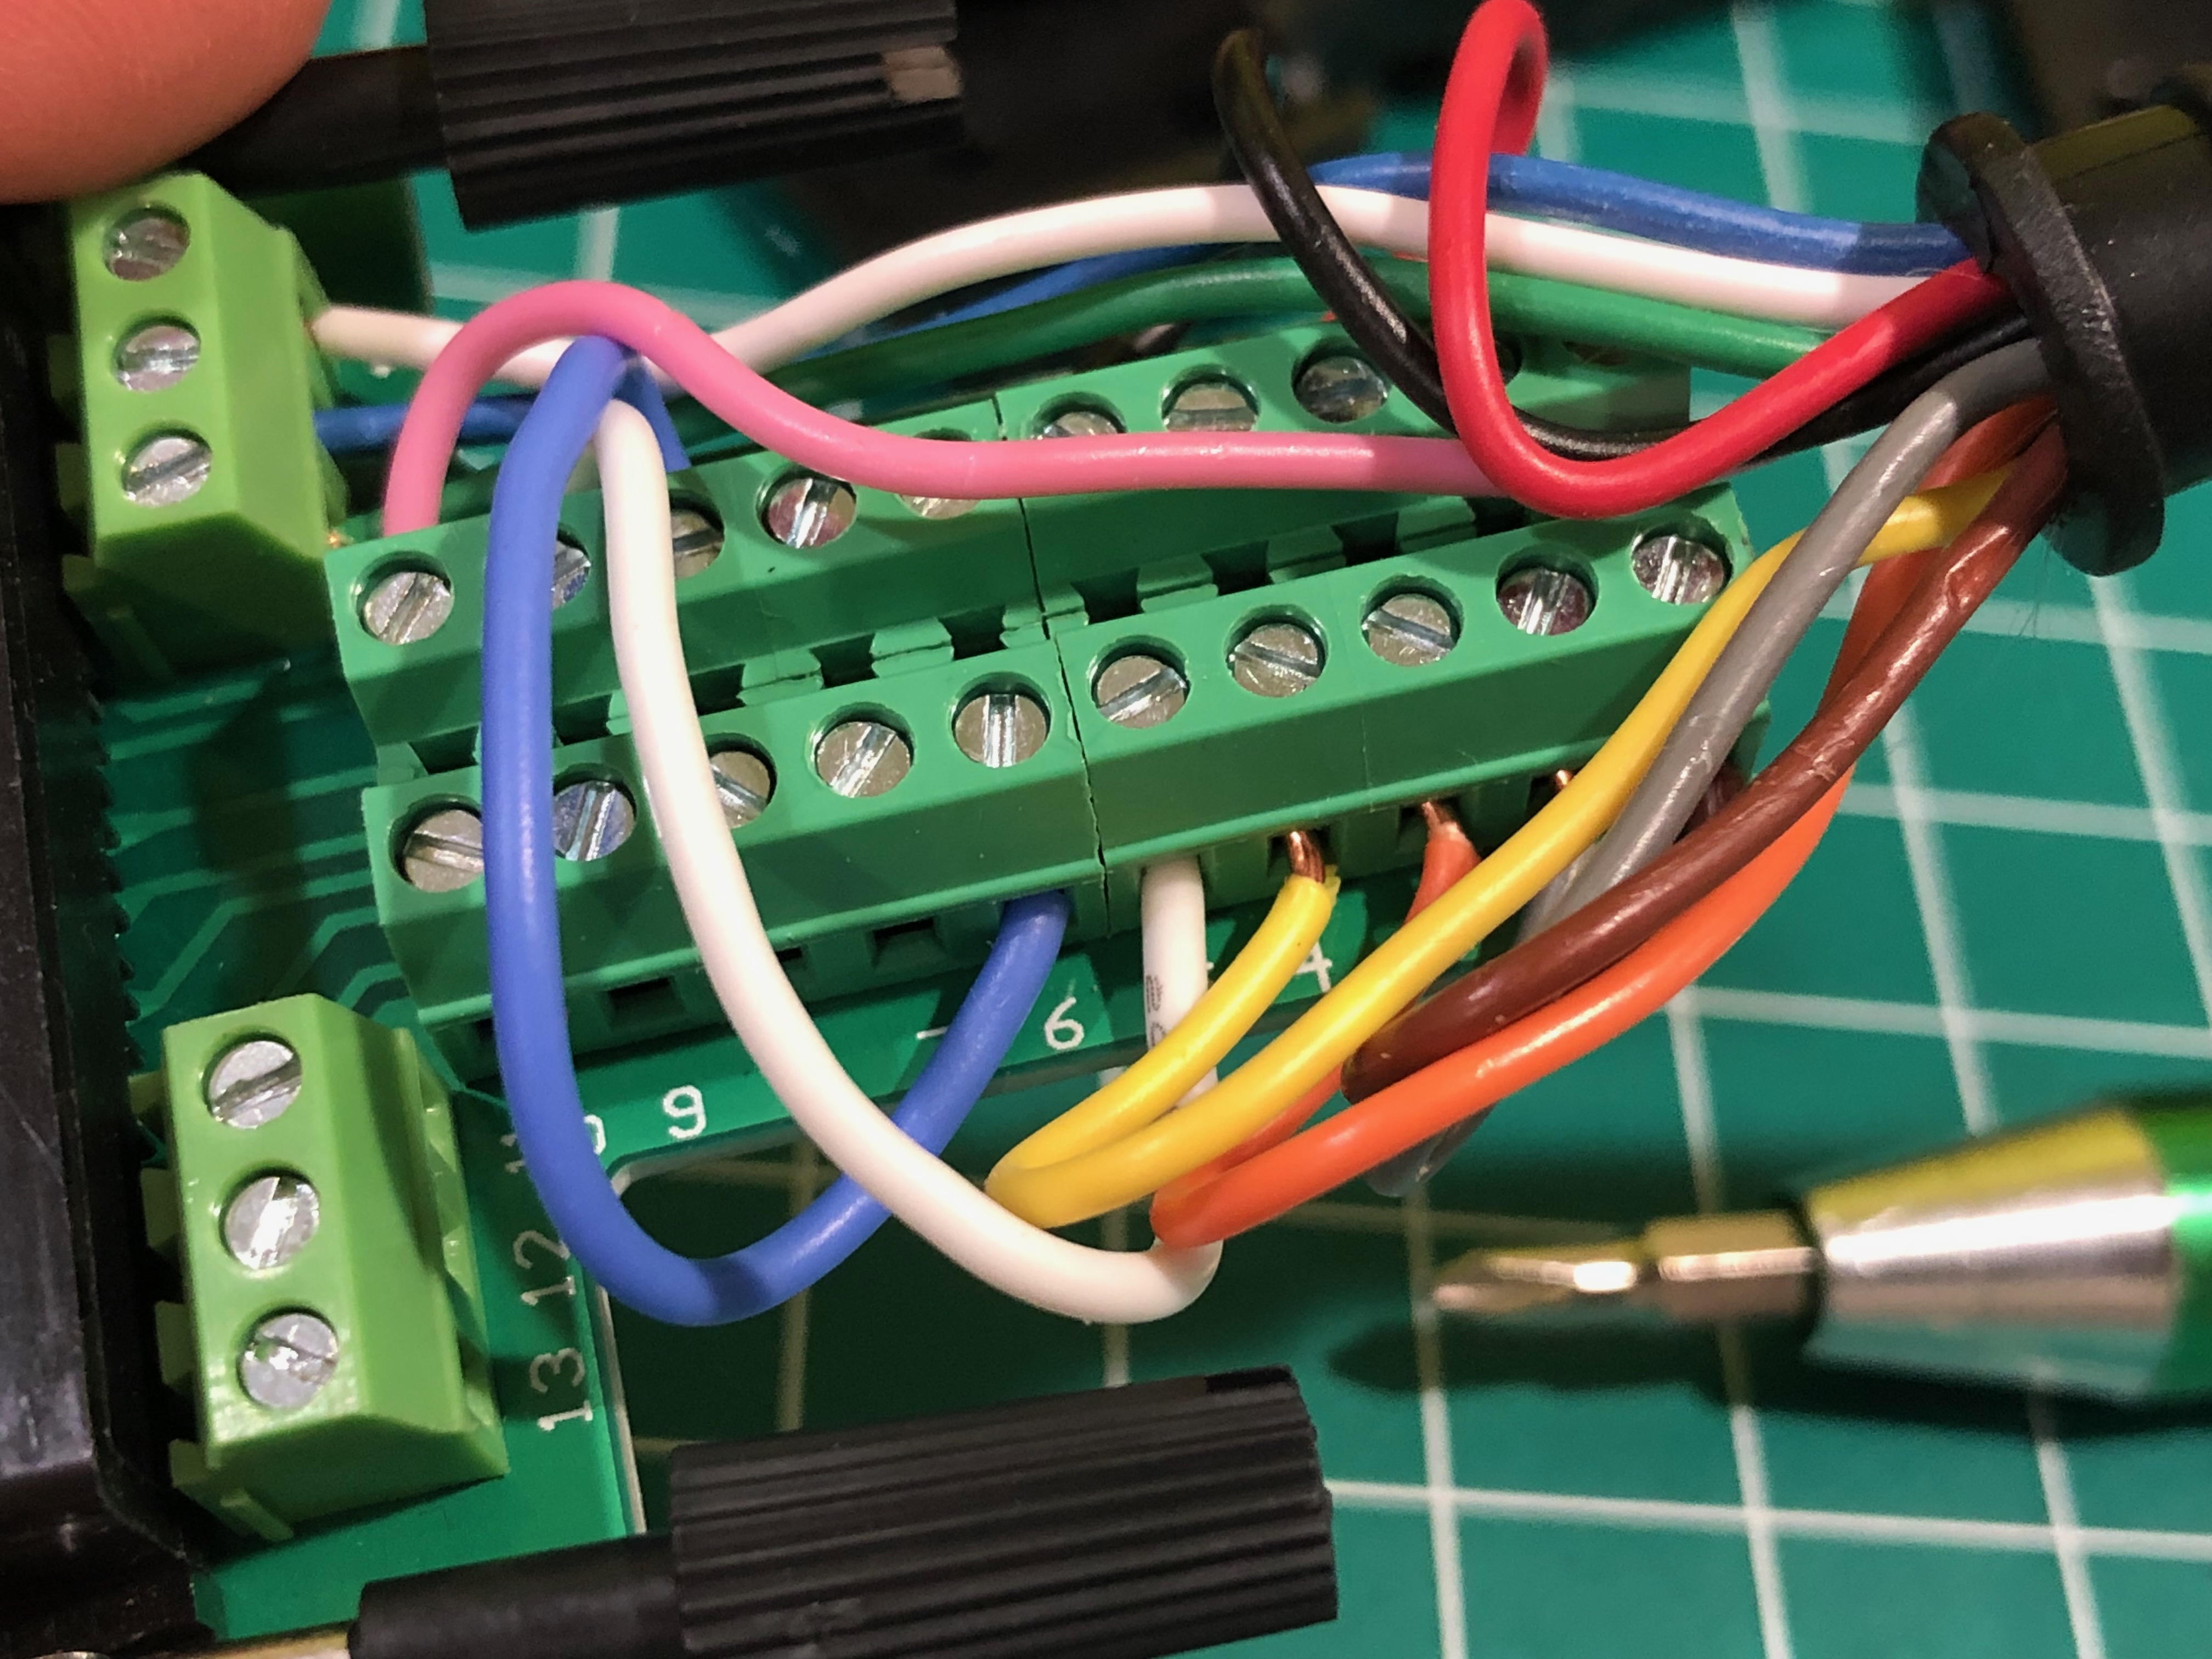
RS232 D-Sub Connector
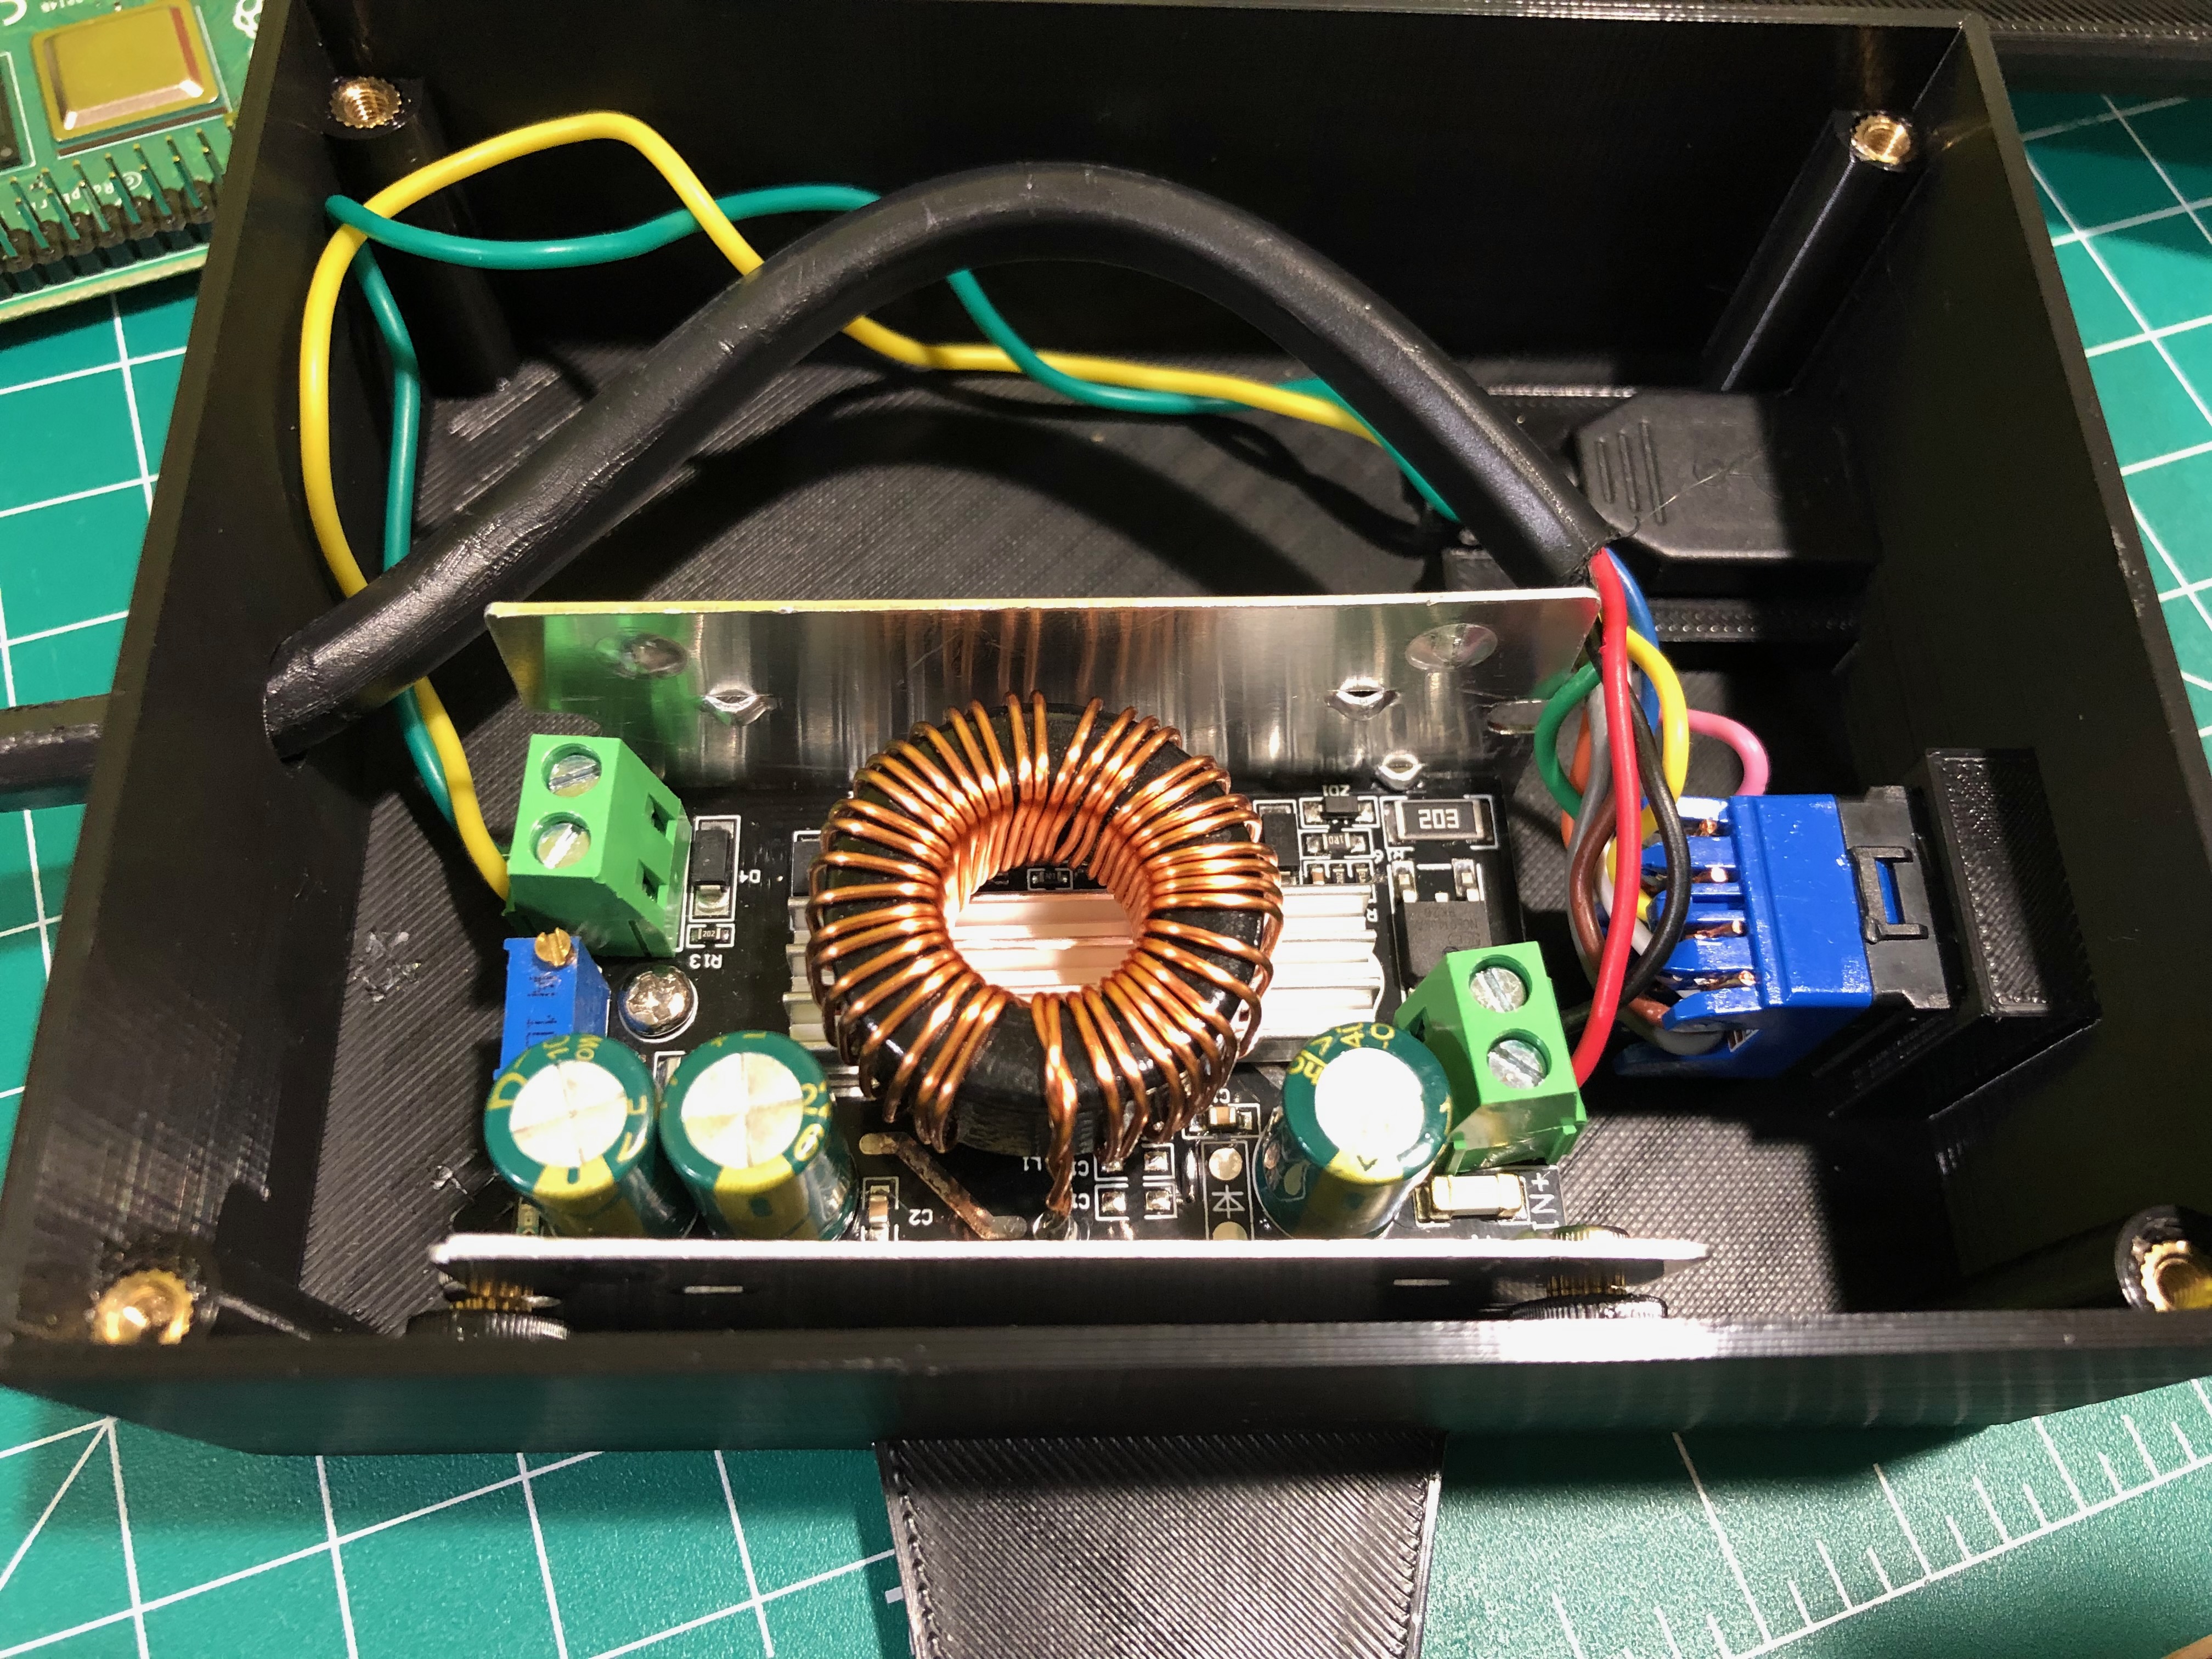
100W 6A DC-DC Buck Converter
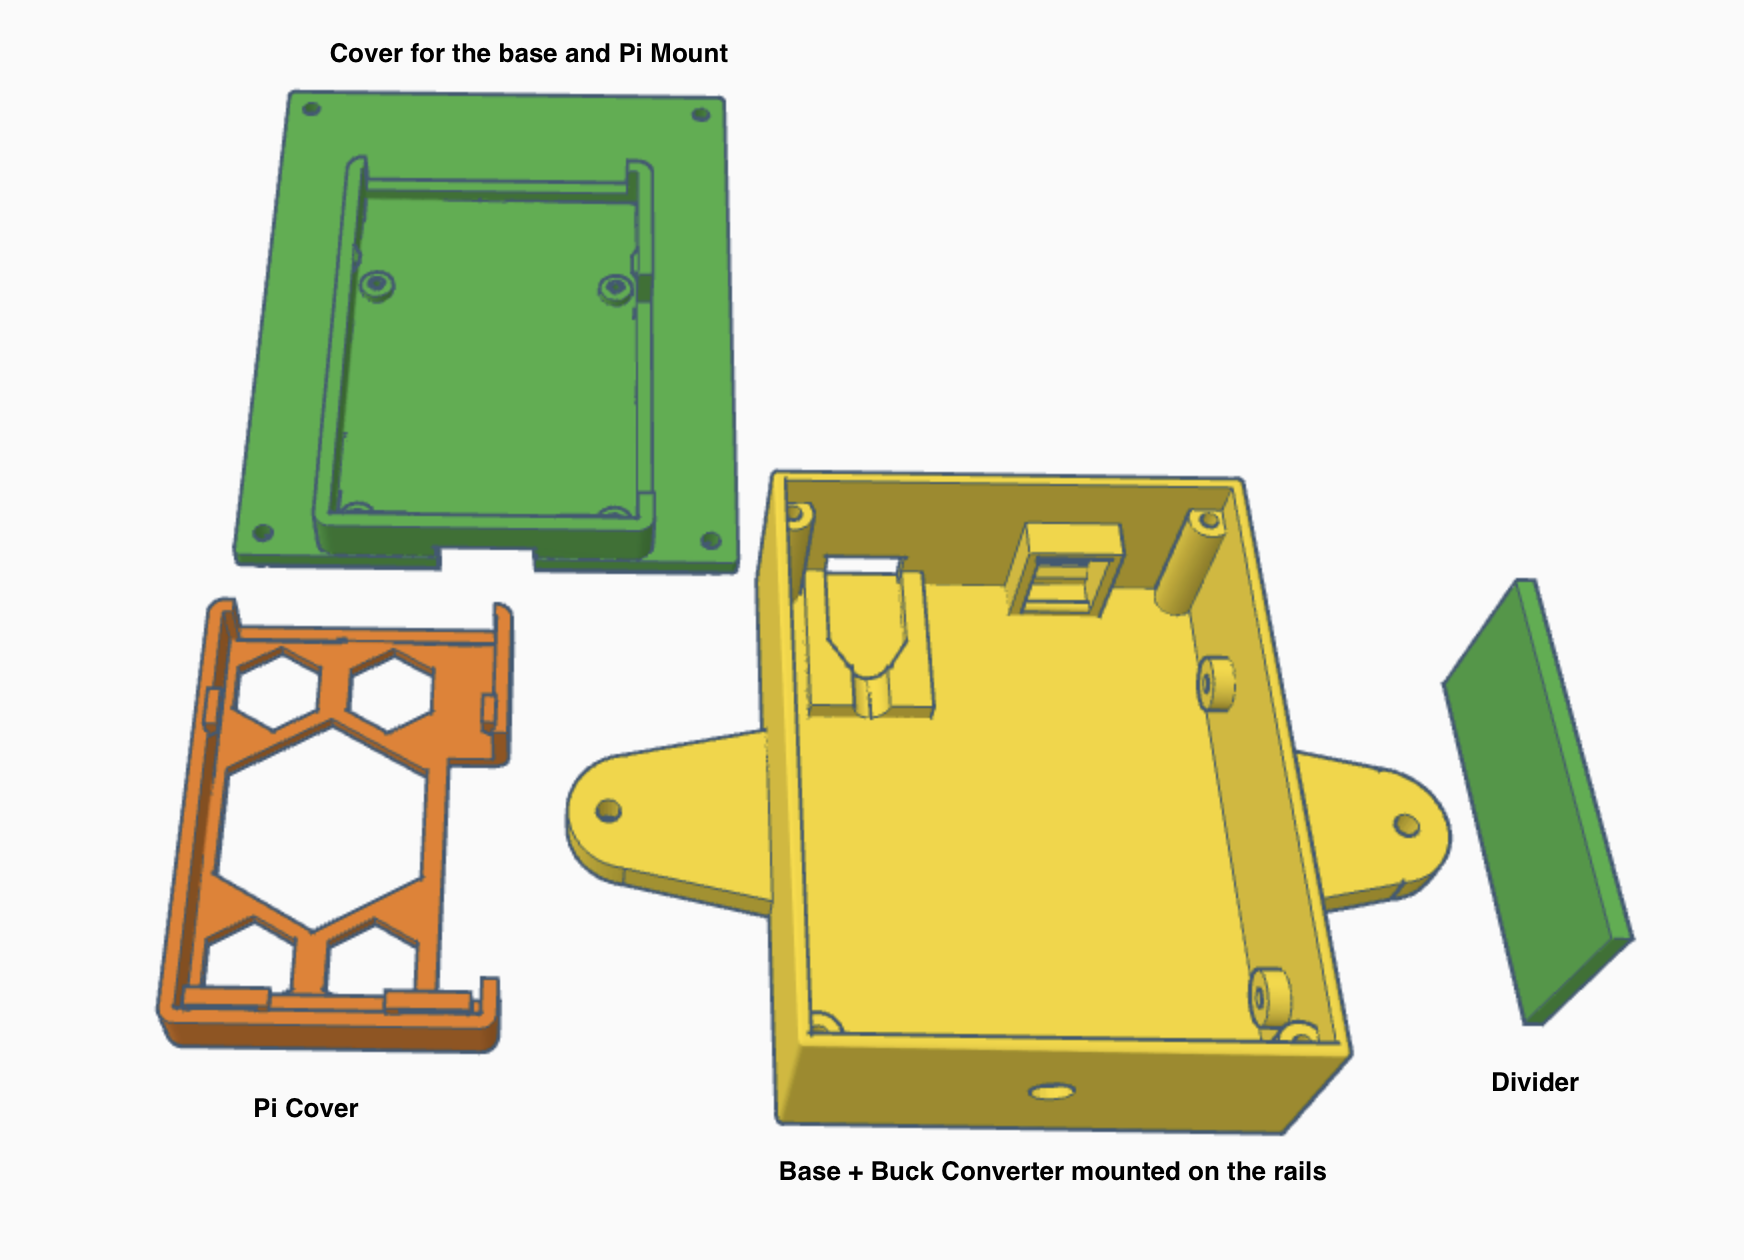
3D printed Case
I designed the mount to have the Pi on the rails. This is a very crude model made in Tinkercad. Before I was comfortable with OnShape.
Used M5 bolts and T-nuts we were able to mount the pi and power it off the payload port!